Nickie’s Sewing Tips

Below are some sewing quick tips.

  • It’s easier to stitch a curved edge than to press a curve. Simply line and turn all curved pockets, flaps and similar details.
  • If your pinking shears are dull, cutting through a double strip of aluminum foil several times will sharpen them.
  • When constructing a blouse, try it on and locate the fullest part of your bust. Put the first button there, then space the rest accordingly thus avoiding a gap.
  • When hand sewing run your thread through a fabric softener sheet to prevent it from tangling
Sewing on knit or stretch fabric

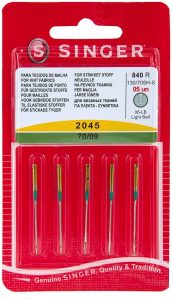
If you are sewing on knit or stretch fabric and no matter what you try your machine skips stitches or snags the fabric. You may want to try a stretch needle. They have a ball point to stop snagging and sit closer to the hook to stop skipping.
The most common brand is the Singer 2045 gold band needle. They are available almost anywhere and come in most sizes.

Downloadable fabric mask pattern

This mask is a design we found  by Grace Jun. It is a simple design that works best with a sewing machine but can be sewn by hand.

Below is what you will need.

Click here to go to the Washington Post page with complete instructions and and the downloadable pattern.

TOOLS

  • Fabric scissors or a rotary cutter
  • Ruler or ruler tape
  • Pins or clips
  • Sewing machine
  • Thread (polyester works well for extra strength)
  • Iron or heavy books
  • Optional: safety pin

MATERIALS

  • Two pieces of 12-inch-long and 7.25-inch-wide 100 percent cotton fabric (tight-weave cotton or quilting cotton). If possible, use two different colors to indicate the mask’s inside and outside.
  • One piece of 12-inch-long and 7.25-inch-wide interfacing or lightweight, breathable, stiff fabric.
  • Fourteen inches of 1/8-inch flat elastic, stretch yarn or additional fabric for ties.


How to find your Kenmore sewing machine model number

Kenmore sewing machine model numbers start with three digits. For example 117, 148, 158 or 385. This number is the manufacturer of the machine.  After this prefix is the model number of the machine. You need both numbers to have the complete model number of your machine.

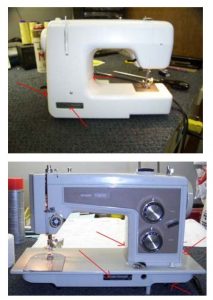
The model number will be on the machine either on a plate or engraved into the machine housing. Many older models the number is on the front bottom. If the machine is installed in a case you will have to tilt the machine back to see the model plate. The four digit model number on the motor of your machine is not the sewing machine model number. It is the model number of the motor. Below are some examples of where to find the model number.

Many different models use the same manual. For example model 158.14000, 158.14001, 158.14002 all use the same manual. 158.1400 is the primary model number. The last digit is when the machine was produced. There may be color changes or other minor changes but the base machine and functions are the same.

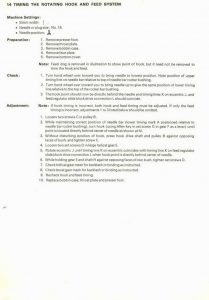
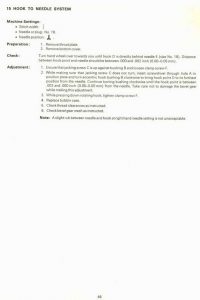
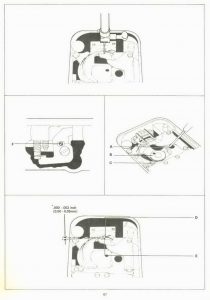
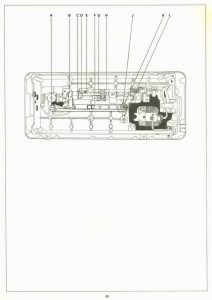
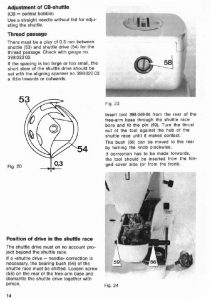
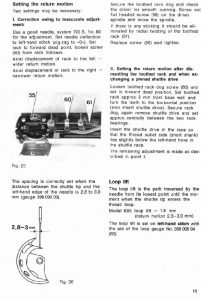
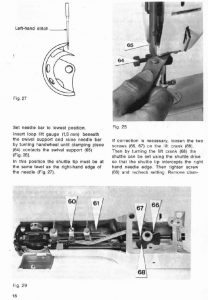
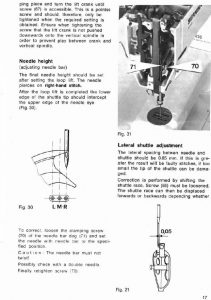
Sewing Machine Timing

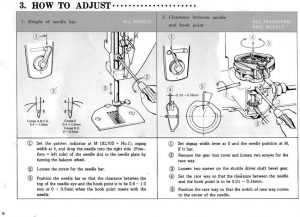
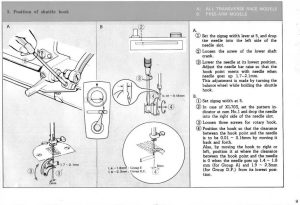
Below are some examples of common sewing machine timing adjustments.

Older Brother sewing machine hook timing:

Common Singer system sewing machine hook timing.

Bernina 830 sewing machine loop lift hook timing:

We will be adding more sewing machine hook timing information in coming days.


Kenmore top tension adjustment

The most common tension system on Kenmore 158 and 148 series machines rarely requires adjustment. If you do have to set the tension or if it came apart here are some tips.

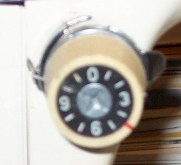
  The tension should be set at 4.5 from the factory when the machine was new. If it has to be reset remove the center screw and the cover plus the indicator will come off.

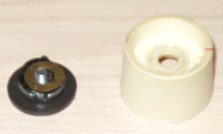
 Once removed you will be left with the tension discs and adjustment nut. Now you can adjust the tension to what you want before replacing the outer dial parts. Before adjusting the top tension be sure the bobbin tension is not too tight. When holding the bobbin case with a full bobbin inserted you should be able to pull the thread with a bit of tension on it.

 The top tension parts are shown in the order they came off.

 Put the parts together as shown and reinsert the outed dial at 4.5 once you are happy with the tension adjustment. Then you can carefully add the other parts and tighten the center screw. Do not over tighten the screw. The “0” and the point of the stop washer should be at the top.

Overlock threading tips

Many people encounter problems re threading their machine after the lower looper thread breaks. The needle threads must be removed from the needles before threading the lower looper. If not, the needle threads will get caught on the back side of the lower looper thread and break after two or three stitches.

The rule of thumb is to re thread the machine loopers first then the needles.

Thread looping on the bottom of your fabric

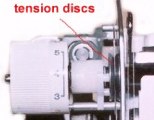
The main cause of this problem is related to the top tension. Simple checks are make sure the thread is between the top tension discs. Check by dropping the pressure foot and lightly pulling the thread to see if there is resistance. Some examples of tension discs are below.


There may be lint caught in the tension discs. Gently check between the discs for lint. This will cause the discs to push apart  and reduce the top tension.

It is a good idea to simply re thread the machine after you have checked the tension unit.

Sewing machine needles. An important part of your machine

Your sewing machine needle is just as important as any other part of your machine. It has to go through the fabric and meet the hook at the right point to create a stitch.

Sewing machine needles have an indent on the back behind the eye. The hook picks up the thread at this point.

If your needle is bent or damaged the hook can miss the thread and skip a stitch.

Sewing machine needles also have a groove in the front that the thread sits in when it goes through the fabric. You must make sure you use the right needle size for the thickness of thread you are using.

Always be sure to check your needle before starting to sew.